

Layout Versus Schematic
Authors: Michael Cunningham, Joseph Chong, and Dr. Dong S. Ha
We run LVS to check that to make sure all components are added and the parameters are set according to the schematic. It also check whether routing has connected two pins according to the schematic. Only the usage of Assura LVS is discussed here.
1. First we have to copy some files. (Note: This should be in your main projects directory):
In the terminal paste/type the following line:
Terminal Code (case sensitive): |
cp -r /home/ece4220/PDK/65nm_TSMC/{Assura,assura_tech.lib} . |
Now, in the terminal paste/type:
Terminal Code (case sensitive): |
echo "DEFINE avTech \$ASSURAHOME/tools/assura/etc/avtech/avTech">>cds.lib |
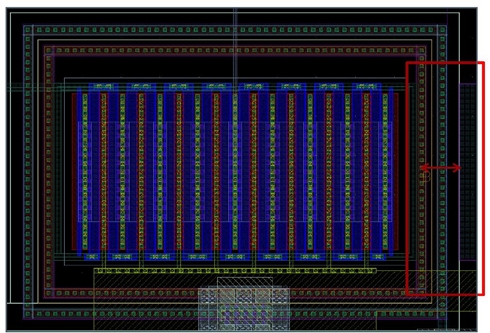
2. In the layout window, go to Assura → Run LVS....
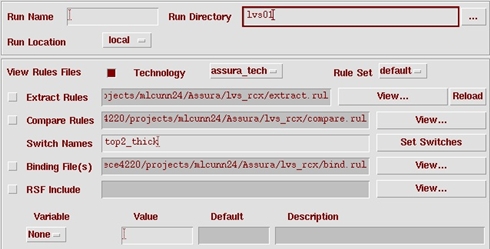
3. Switch the technology to assura_tech next to the "View Rules Files" section and type in a name for the "Run Directory" (e.g. "lvs01").
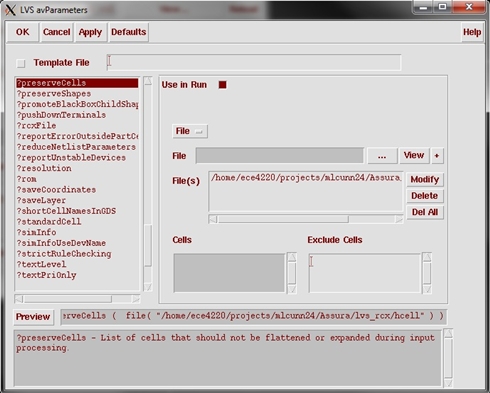
4. Also, click on "Modify avParameters" and go to "?preserveCells".
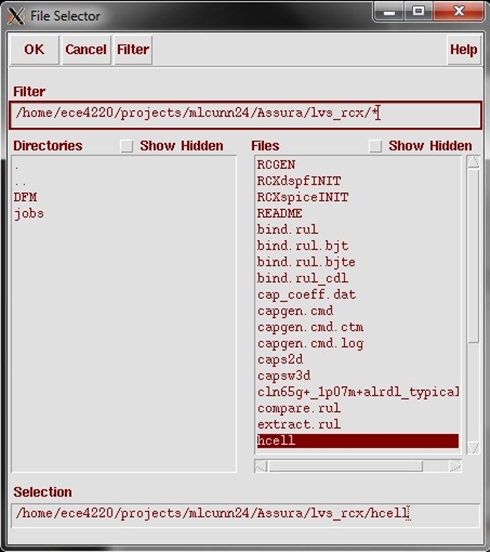
5. Browse the files ("...") and double-click on Assura → lvs_rcx, then double-click on hcell (in the "Files" column).
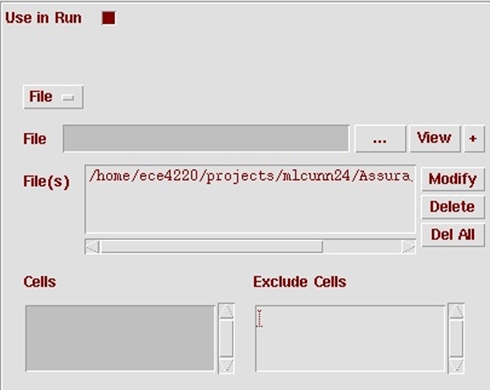
6. Select "+" on the right, check the "Use in Run" square, and then select OK. It should be added to the avParameters in the original window at the bottom.


7. Run LVS by selecting OK (it's fine to overwrite the last run if you don't plan on using the previous data). A progress box will appear in the lower right-hand section of your screen. If it takes a very long time, you will most likely have errors (or limited server space).
Debugging with LVS
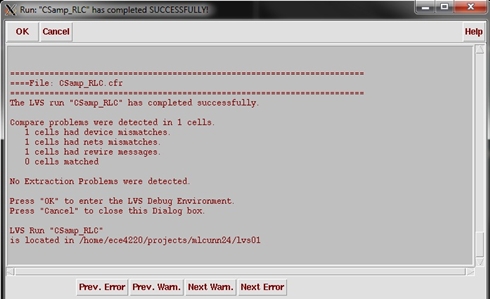
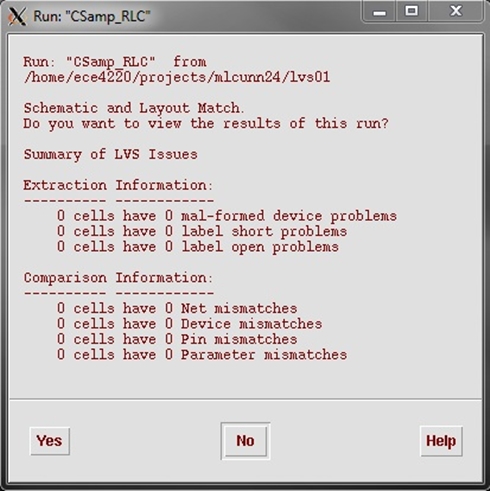
1. If you run LVS and you receive a message like the one below, you have some issues. Select OK.
2. A debug window should appear. If not, go to Assura → LVS Debug Env... to open the debugger.
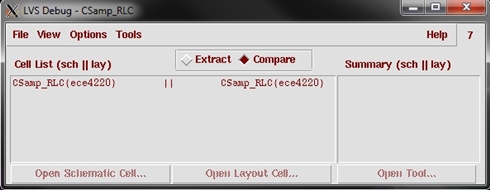
3. In the debugger, select one of the cell list items and a summary of the issues will appear to the right.
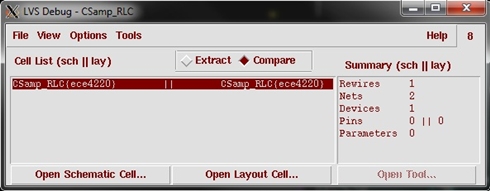
A few mismatches are shown, but they could all be flagged from one error (in this case, I have forgotten to add a net). You can select each message summary and choose the "Open Tool..." option to easily find and debug.
- Often "Rewires" will provide the clearest insight to the problem.
- "Nets" is useful if you have completely forgotten a connection, but it will be shown in terms of net names which can be confusing.
- "Devices" is most useful if you've forgotten a device in the layout or added one. ("Connectivity → Update → Device Correspondence" can be useful in linking a layout device to a schematic device.)
- "Pins" should be straightforward; missing, misnamed, or added.
- "Parameters" is indicating that the parameters of a device in the layout do not match the corresponding device in the schematic. This is often fixed manually or with an automatic tool in the layout window ("Connectivity → Update → Layout Parameters" to change the layout to match the schematic or "Connectivity → Update → Schematic Parameters" to change the schematic to match the layout).
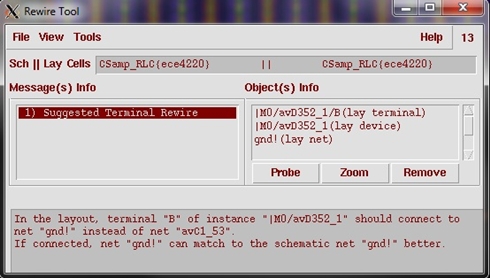
If you select an error in the object info column, Zoom will focus the error in the layout and Probe will highlight the error in the schematic view. The message descriptions are also very useful in identifying the real issue. As an example, in the error below I have forgotten to connect the bulk of the MOSFET "M0" to ground ("gnd!").
Once you think you've fixed the obvious errors, Re-run LVS. (You can save your design with the bindkey "F2").
NOTE: If you forgot to remove the probes before exiting the debug environment, go to Assura → Probing... and select "Remove All" at the bottom of the window.
Once you have successfully fixed any errors and your layout and schematic match, you will receive a single window with the summary. Select "No"; there is no need to view the results of a successful run.

MICS IAP Members


