

Installing XWindows
Getting Started
Creating CVL Account (VT Users Only)
- Please visit: https://computing.ece.vt.edu/accounts/
- Detailed instruction: https://computing.ece.vt.edu/wiki/Getting_Started
Remote login for Windows
Install Xming:
- Available: http://sourceforge.net/projects/xming/
- Let all options be default during installation.
- Xming must be running for remote connection.
- To verify this, there are two methods:
1. Check for the Xming icon in the quick launch bar (near volume control, connectivity, and wireless icons).

- 2. Check using the Windows Task Manager:
1. Press Ctrl + Shift + Esc (to launch the Windows Task Manager).
2. Select the Processes tab.
3. Look for Xming.exe (it will probably be at the very bottom if you arrange the processes by name).

4. Also install Xming fonts:
1. Click Xming-fonts, then 7.5.0.70.
2. Download Xming-fonts-7-5-0-70-setup.exe. During installation, make sure that it is installed in the same folder as Xming.
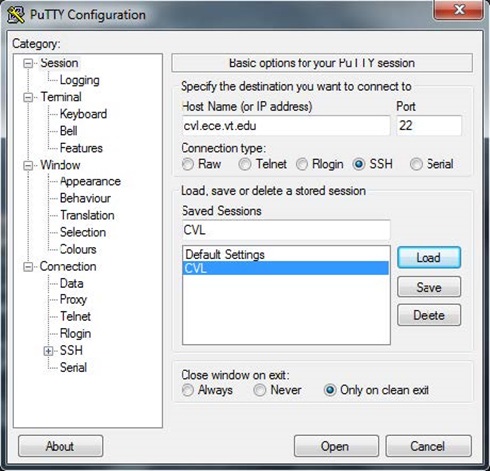
Download PuTTY:
- Available: http://www.chiark.greenend.org.uk/~sgtatham/putty/download.html
- Run putty.exe.
- In the left section column, go to ‘Connection’ → ‘SSH’ → ‘X11’ → ‘Enable X11 forwarding’.
- Go to ‘Session’ in the left section column. The ‘Host Name’ is cvl.ece.vt.edu. "Save" the session under the "Saved Sessions" section with an appropriate name (e.g. "CVL").
- "Load" the saved CVL session and select "Open" (or double click on the session).
- The terminal will open; enter your login ID and password when prompted.
- Available: http://www.chiark.greenend.org.uk/~sgtatham/putty/download.html
Next time you login or start another sessions, make sure Xming is running. Run putty.exe and click on the previously saved session.
To make any changes in the database (for which you have special permissions): ssh filebox.ece.vt.edu.
This is after step 4 of the normal execution. Ignore step 5.
NOTE: In case you are remotely connecting via a windows machine, then to copy files to your home folder on the CVL machines. ‘My Computer’ → ’Map network drive’ → type ‘//filebox.ece.vt.edu’

Type ‘\\filebox.ece.vt.edu’; provide PID and password when prompted. You can select any free drive (here, Y).

File Access/Transfer (GUI):
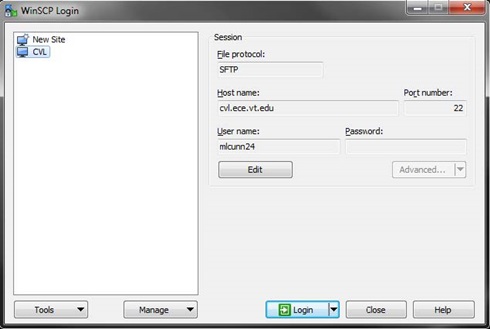
Download WinSCP:
To allow for transfer of files between the server and your computer, you will want to download Windows Secure Copy (WinSCP). It uses a graphically interface (as in Windows).
- Available: http://winscp.net/eng/download.php#download2
- Download the "Installation Package".
- Run the setup file you downloaded.
- CVL should be listed (after you setup the CVL session in PuTTY); enter your login information to connect to the server files that you have permission to access.
- Available: http://winscp.net/eng/download.php#download2
Remote login for MacInstallation of X Qurtz
Install X Qurtz.
- Available: http://xquartz.macosforge.org/landing/
- Open a terminal from your computer.
- Click: Applications -> Utilities -> Terminal
- When a terminal window opens, type
ssh -X your_user_name@cvl.ece.vt.edu

 Next Page
Comments to: ha@vt.edu

MICS IAP Members


